Want to spend some quiet quality time at home with your special someone this Valentine’s Day? Get a bottle of your favourite Chandon Brut and woo your Valentine with these easy cocktails. Rohan Jelkie, the brand ambassador of Moet Hennessy India tells us how to get the right drinks using some easily available ingredients in the comfort of your home.
Valentine’s Day is almost here and we are sure you have already picked out your gifts for that special someone. A very important part of the ceremonious gifting process is ensuring that your present is packed properly. If you want your gift wrapper to stand out from the ones available at the gift shops, just make it yourself with the help of this Valentine’s Day Gift Wrap tutorial.
Things you need: Butter paper, a pair of scissors, red ribbon, red felt pen and clear tape
Step 1: Place the butter paper on a flat surface.
Step 2: Using the felt pen, draw a motif (like a heart) uniformly on the paper
Step 3: Fill the gaps between the motifs with your choice of text
Step 4: Pack the gift carefully using the paper you just designed
Step 5: Tie the ribbon across the gift with a neat bow on top
Add a new twist to your nail art with this simple DIY tutorial. Just use these simple products available at home and give yourself a manicure that looks as good as one done by a professional.
Things you need: A black nail paint, a white nail paint and base coat; a set of toothpicks, one empty cup, water and nail paint remover.
Step 1: Start with applying the base coat to your nails and let it dry. After it has dried, apply the black nail paint to your nails and wait until that is dry too.
Step 2: Fill half the empty cup with water and carefully pour one drop of the white nail paint in it. Make sure that water is at room temperature as this helps the nail paint spread evenly.
Step 3: Using a toothpick, draw a textured design on the nail paint and water mix in the cup just like it’s done in picture 5.
Step 4: Once you get the right texture, dip your finger in the cup for approximately 15 seconds until that design is replicated on to your nail. While the finger is still immersed, with the help of a toothpick wipe off the excess nail color to avoid it from sticking on to your skin as shown in the picture.
Step 5: Take out your finger from the cup and let the nail art dry completely. Once again, remove any excess nail paint with the help of some cotton and nail paint remover. Finish your look with a topcoat.
Easy, isn’t it? If you don’t have black or white nail paints, feel free to experiment with different colours. We suggest using shades of neon to create a chic summer look.
Give your jumper that high-street ‘studded’ look with this simple DIY hack that will not only spike up your old piece of clothing but also give you something new to strut, without burning a hole in your pocket! Take a look.
Step1: Raid your wardrobe and look for that perfect old jumper which you are most definitely never going to wear. (You can also try this technique with a new one if you like)
Step2: Getting these spikes. They come in different colors, sizes and styles. Sourcing them isn’t very difficult either, as they are very commonly available in the market and don’t really cost a lot.
Step3: Take your jumper and mark the points where you’d like to place the studs as per your will; I am going to place them on the shoulder top and the front side of the arm hole in this L-like shape.
Step4: Place the studs on the marked points and start inserting the lower screw from the inside very carefully and tighten them up. Voila! You’re done.
The best part about these spikes is that they work exactly like a screw therefore they’re easy to lock. You don’t need any sewing or gluing. Add more studs at different spots on your jumper if you like and give yourself a new look this season without spending money in a new spiked up sweater!
If you want to curl your hair and cannot afford to buy a curling iron at the moment, here’s an easy solution. Fashion and makeup blogger Camila Coelho knows just the right trick to get the perfect loose curls using a straightener. Take a look at this tutorial and get ready to flaunt those curls.
Planning to discard your old denim shirt? We are just going to give you reasons to change your mind with this simple DIY hack. Watch as we show you how to revamp your old wardrobe staple and give it a whole new look.
Things you need: An old denim shirt, a bucket, fabric bleach, vinegar, a plastic bag, gloves (so your hands are safe), an elastic band and water.
Step 1: Take the bucket and put two parts water and one part bleach depending on the size of your bucket and mix it well. Make sure that you have your gloves on while you do this.
Step 2: Fold your shirt and cover the upper half of the shirt with the plastic bag and secure it with the elastic band. Make it tight because you don’t want the mixture seeping in through the band to the upper half of the shirt.
Step3: It’s time to dip the lower half of your shirt into the bucket. Make sure that the shirt is properly immersed till the band into the mixture. Let the bleach do its magic for about an hour and ensure that you check the shirt for the color loss once in 45 minutes.
Step4: Now take the shirt out and rinse it thoroughly with water so all the bleach is washed out.
Step5: To make sure that the color stays and the bleach is no longer effective, take another bucket and put two parts water and one part vinegar and put the faded part into the solution.
Step6: Let it stay for ten or fifteen minutes and voila!
Wash your shirt properly and you have a brand new shirt to strut this weekend!
The cold weather should not stop you from experimenting with your looks this winter. Fashion blogger Mimi Ikonn gets you the perfect ensembles to prep your winter style using things that you might already have in the depths of your closet. Here’s how to go about it.
Decorate plain walls or pin boards with these pretty paper butterflies. Follow these three simple steps and jazz up any space using these paper butterfly decorations.
Things you need: A pair of scissors, craft paper in different colours and a pencil.
Step 1: Fold the craft paper into half.
Step 2: Draw half a butterfly on it as illustrated in the picture below.
Step 3: Cut the butterfly along the drawing and you’re done!
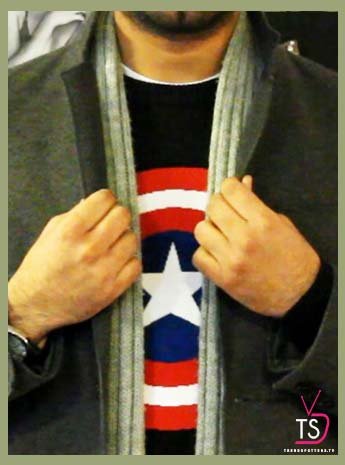
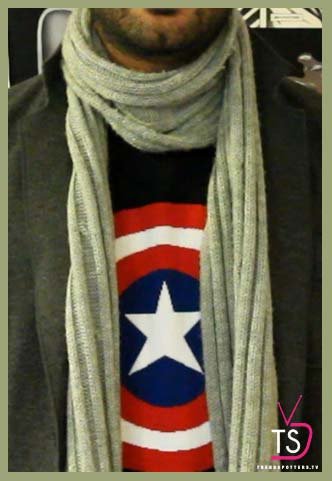
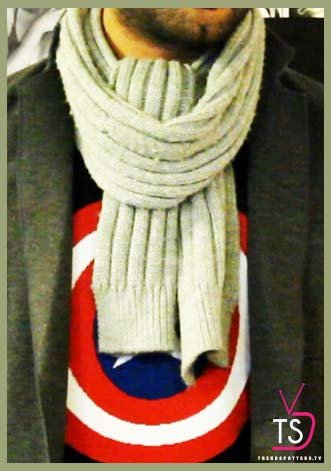
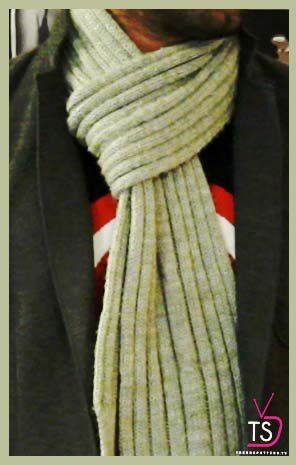
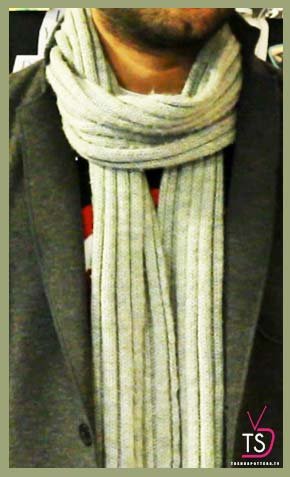
There’s no better winter accessory for men than a scarf or muffler nattily thrown about the neck. Tying them the right way can sometimes be all you need to get that perfect dapper look. Watch this video to check out different and stylish ways to sport the scarf this season.
Oxblood is the new neutral and we can’t get enough of it. The hottest colour trend of the season is here to stay and how. While incorporating the colour into your ensemble is fairly easy, including it in your makeup regime is slightly tricky. Take a look at this video by Youtuber Michelle Phan and learn how to pick your shade of oxblood and get the perfect dark lips.
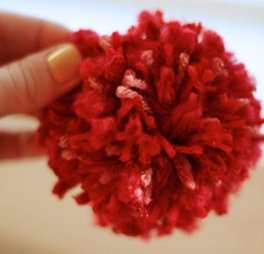
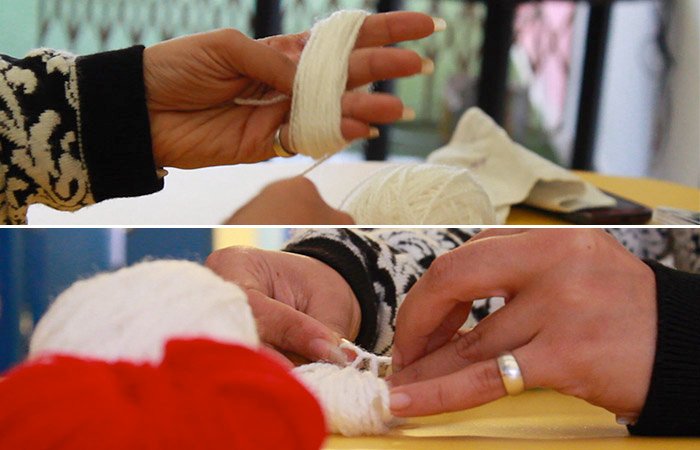
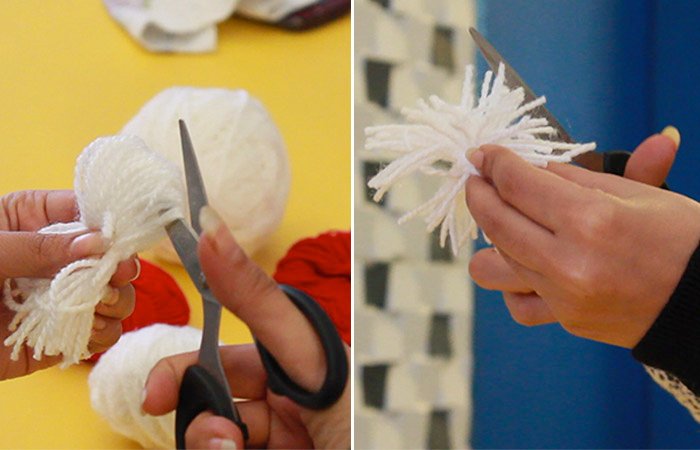
Need more decorations for your Christmas tree? Here’s a simple tutorial for you. Turn those extra wool yarns at home into these pom poms. Here’s how.
There are never enough Christmas tree decorations. Now make these Christmas pom poms at home and use them as fillers for your tree. All you need is a pair of scissors and wool yarns of your favourite colours.
Roll the yarn around your fingerswhilekeeping the first end of the yarn at the center of your palm, cut the other end and tie the two ends together towards the center of the roll.
Cut the opposite ends of the roll into pom pom like shapes and you’re done.
Christmas is all about making your loved ones feel special. And great gift wrapping ideas for Christmas presents add that extra element to your gift. This simple DIY tutorial will help you add that special something to your Christmas gifts and make them stand out. Learn gift wrapping for Chistmas with this video and spread the holiday cheer.
Things you need: Coloured craft paper, ribbon, a pair of scissors and a pencil
Step 1: Draw a feather on the coloured paper and cut it out.
Step 2: Now take the feather and bend it slightly inwards towards the center.
Step 3: Cut the sides into a feather-like shape.
Step 4: Tie a ribbon around the present and fix the feather like this.
You may add more feathers of different colours if you feel like.
That time of the year is here! The days are shorter, the air is getting crisper and you will soon start noticing people putting gifts under the Christmas tree. Christmas is all about traditions that help you create memories with your family and loved ones and Christmas gifts make upthe most important part of this cherished time. While everyone usually gets the Christmas gifts ideas right, the festival demands for them to be presented in a certain manner. Spruce things up this season by using these unique Christmas gift ideas and add special little elements to your presents. We have put together a list of simple DIY hacks that can turn your Christmas gifting experience into a whole lot of fun.
#1 Add a customised pillow with your gifts
http://www.pinterest.com/pin/416371928024252172/
Add a pillow with a personalised message with your gifts. Get a plain white pillow and write your Christmas message with a permanent marker. Or turn it into a postcard pillow if you can’t be with your friends or family just like the one shown above.
#2 An oven mitt full of kitchen accessories
http://www.pinterest.com/pin/57843176439803593/
All mothers love new accessories for the kitchen. This Christmas fill an oven mitt with kitchen gadgets like a knife, kitchen spatulas, a timer, rolling pins and more. Tie a ribbon around it and be prepared to receive some mother lovin’!
#3 Personalised mugs
http://www.pinterest.com/pin/548805904561936576/
Simple Christmas gift ideas to please your parents; buy two plain mugs and write personalised messages on them. You may add their tea/coffee preferences on them and voila, there’s that special affordable add-on with your presents.
#4 Manicure kit in a jar
http://www.pinterest.com/pin/452822937507490435/
Looking for unique Christmas gift ideas for your sister/girlfriend is a difficult task. Here’s something that could help. Buy manicure essentials like cotton balls, nail paint, nail paint remover, a nail clipper etc. Get a mason jar or an old jam jar and fill it up with cotton first and then the other products. Tie a ribbon across the lid. You may also add a small message card on the side and you’re done.
A perfect add-on for kids, these Rudolph gift envelopes are very easy to make. Put small personal handwritten messages in these envelopes and make Christmas gifts special!
If your girlfriend or wife isn’t around to help you pack, then here is a simple way of packing your vacation bag in less than 5 minutes. Take a look at a quick tutorial that helps you organize your travel bag and make your life easy!
Starting with the clothes. Carefully roll your trousers like this and let it be the first item of clothing that goes inside the bag. Your shorts go next. Now roll your shirts like the trousers ensuring the collar remains on the outside so it doesn’t get crushed. This method saves you a lot of space and the clothes remain wrinkle free.
Your rolled t-shirt goes in next like this. You can now cover the items with your hand towel on the top so it comes in handy. Don’t forget your socks, fold them like this and place them in the side pocket.
About the essential bath & grooming products, they can be clubbed together in a small wash bag. You fill this bag with necessary items like your perfume, tissue papers and other toiletries. Carefully place the wash bag in one corner inside the travel bag.
For the travel accessories like your belt and sunglasses here’s what you need to do. Zip up your bag and ensure that its safe and tight and enjoy your vacation!